Welcome to the BIG DAY!
Today you are going to start your blog, and you should be super excited.
Before we get into it, this post is long, and probably easier online. You can review it here.
To have a blog you will need two things.
A Domain Name: like FamilyMoneyPlan.com or MyAwesomeSite.com
Hosting for that Domain: This is where your company hosts.
When I started out I used Bluehost, I still use it for some of my sites and it’s great for starting out because you can get started for as little as $3.95 a month.
Starting Your Blog With Bluehost
This will be a how to get started walk through there is a video here.
The first thing to do is go to the BlueHost page through this link.
This will take you to their homepage that looks like this.
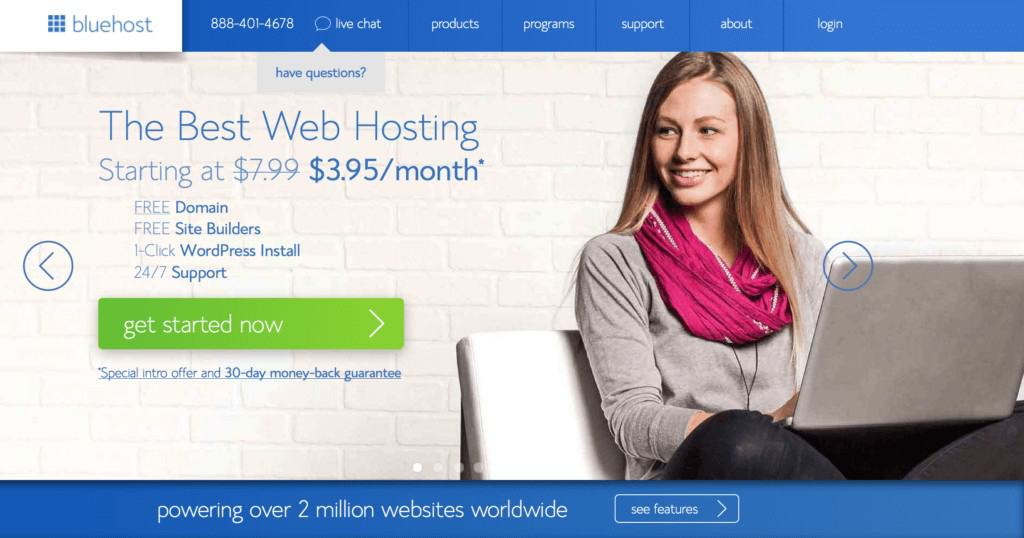
Action #1 – Click on the “Get Started Now” Box
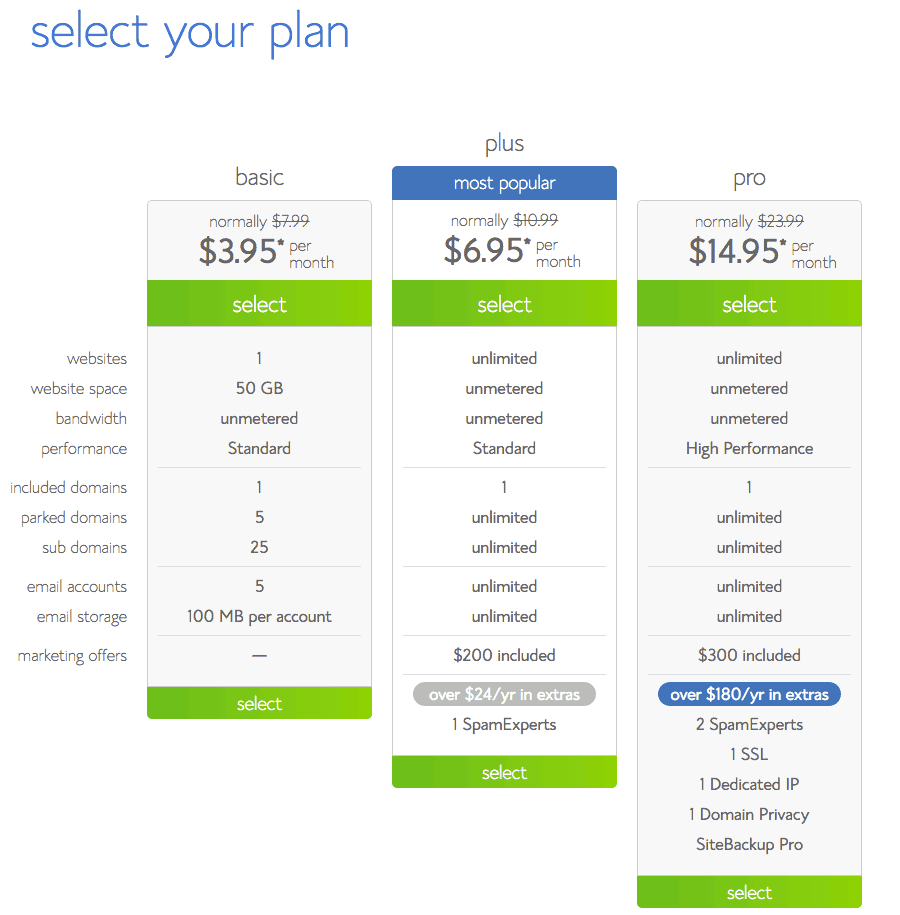
Next, up you will need to select your plan. I went with the basic $3.95 per month plan, it’s got everything a starter needs and you can always upgrade later on. (Their online service is really helpful with this stuff!)
Action #2- Select Your Plan
Action #3 – Select a Domain Name – Free with Bluehost
Next, up you are going to need a domain name. A domain name is what people will put in when they go to your site. Like FamilyMoneyPlan.com. When you sign up with Bluehost through this link you get one free!
This can be tricky but as a rule, it should be memorable.
Try to avoid using “The” at the start of it if you can. Also, make a point of avoiding numbers in the name and plurals too.The “.com” is still the gold standard when it comes to a website, but they are getting hard and harder to find.
If there is a name you just have to have, then consider a .org or .net or another extension that you prefer.

Once you have your domain picked out click on next and you will be taken to the next screen. Isn’t this exciting !!!!
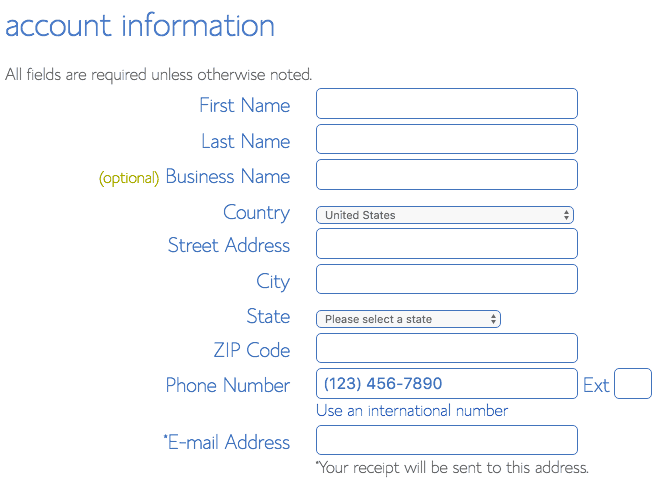
Action #4 – Sign up for your account
This is where you will need to provide some information about yourself. So go ahead and fill that out.
Next, You Will Pick Your Package
I suggest going for the 3 years of hosting if you can handle the upfront cost. It’s the best value. I opted for 3 years when I started because I wanted to give myself that much time to really develop my site.
One other note: There are a lot of options after this, I only picked the Domain Privacy and Protection for $0.99 a month. It keeps your name off of the online database as the registration for your site, just cuts down on the spam emails you get.
Well worth it in my opinion.
The others are entirely up to you, I opted not to do them, but there is some value to them if you decide to choose them.

Fill in Your Credit Card Information in the Billing Section
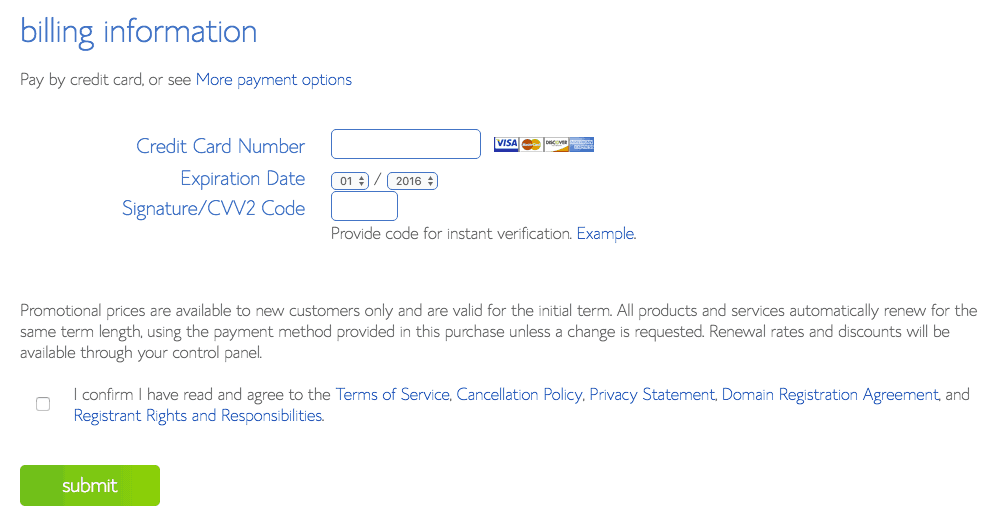
Action #5 – Submit Your Information
Make sure this page is complete and read the box at the bottom to make sure yo agree with the terms and conditions, once you read all of that information you are ready to click on “Submit.
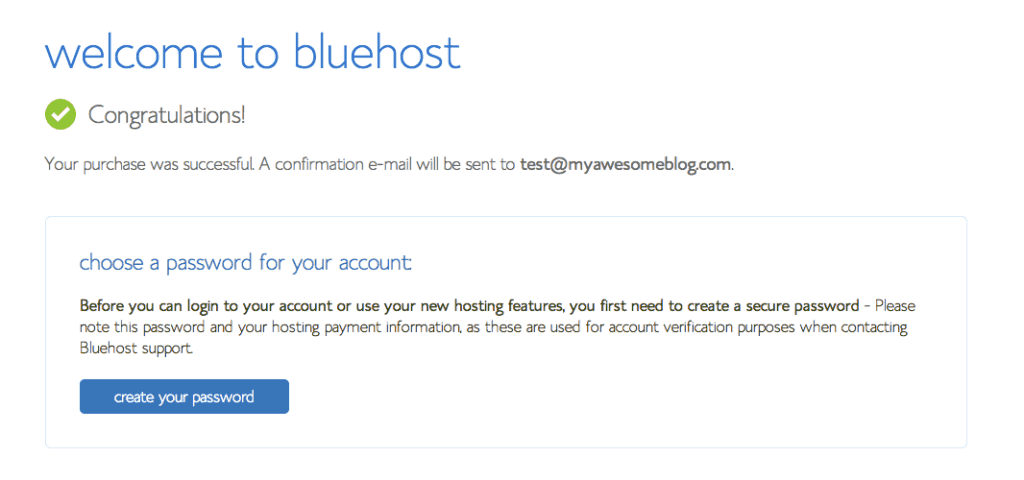
Welcome To Bluehost!
Action #6 – Set Up Your Passwords
Once you have clicked on the Submit button you will get the following screen. Click on the Create your password button. You will get a confirmation email sent to the address in the previous screen. Click on Create your password
In the next step will be creating a password for your site. Make sure to enter something you will remember as you will be using this to get into Bluehost.
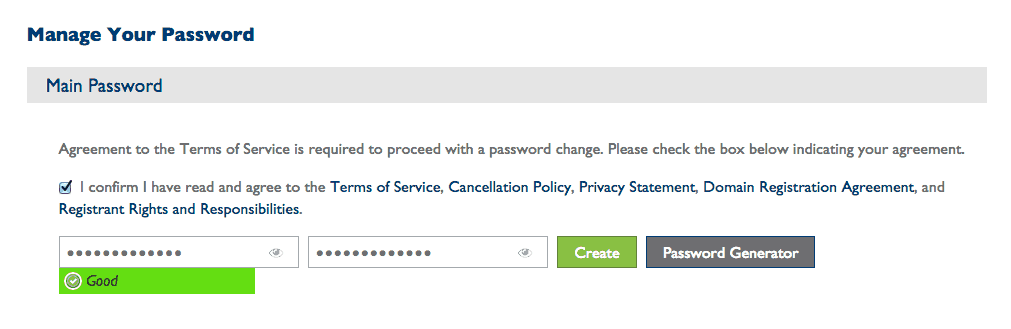
Once you have created your password click on Create. You will be taken to the following screen.
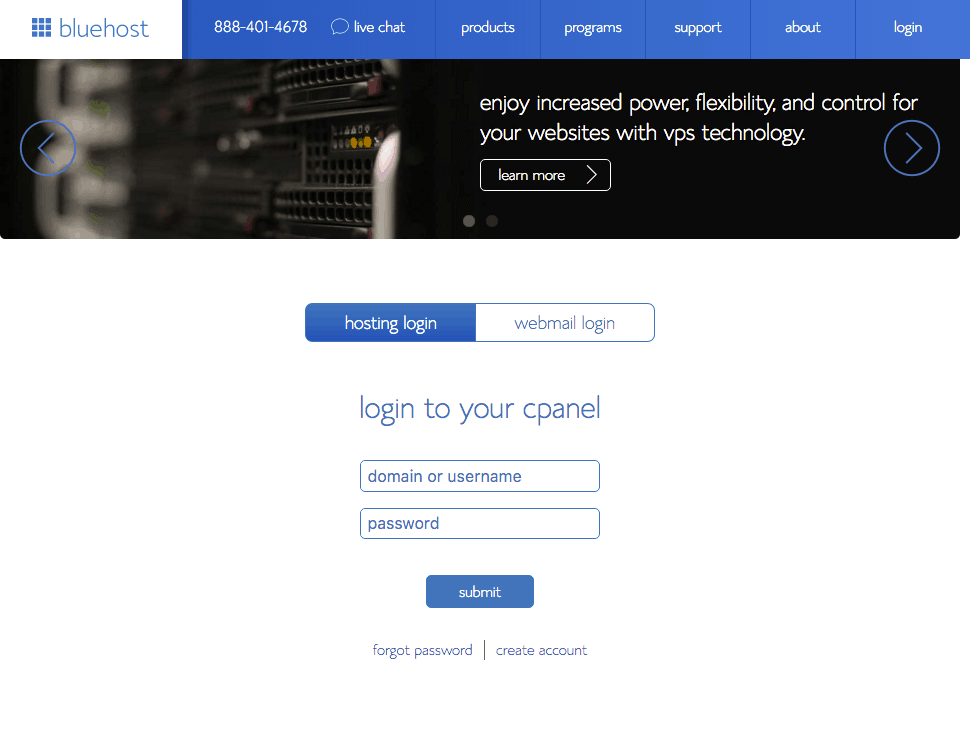
This is your Bluehost login screen. So far we have our domain and our hosting. Well done!
Now we need to get WordPress installed on our site.
WordPress is the program you will be using to create your site and publish your posts.
Enter in your domain or user name and the password you just created.
Then click on the Submit button. (In the future you will be able to get to it by going to the main screen on blue host and clicking on the login at the top left hand.)
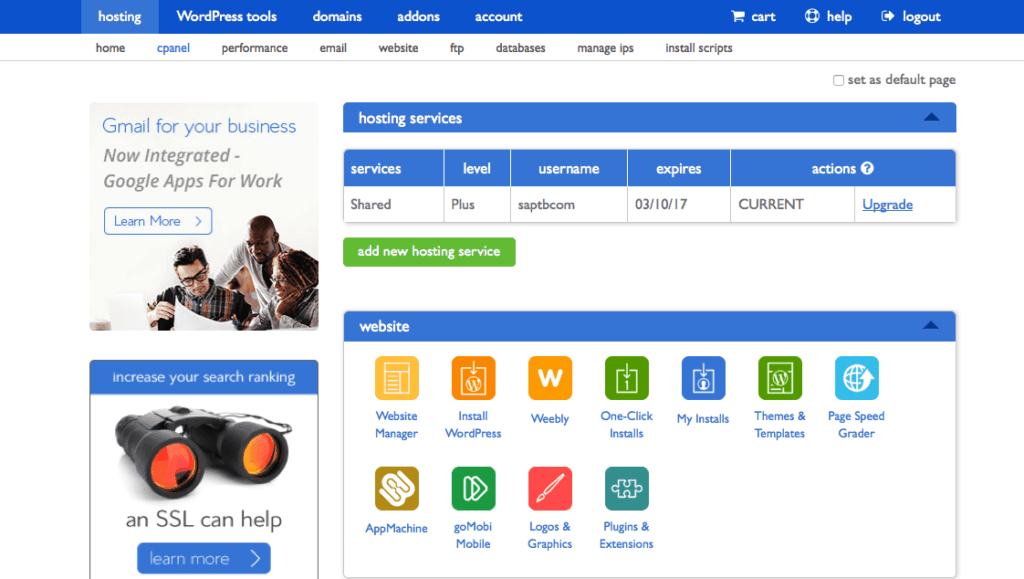
This will take you to the cPanel in Bluehost. This is your behind the scenes website. In here you will be able to do a lot of behind the scenes website stuff.
The BlueHost cPanel:
Action #7 – Install WordPress.
Scroll down to the website area and click on the “Install WordPress” Button. This will set up WordPress on your site so that you can start blogging.
You will get this screen:
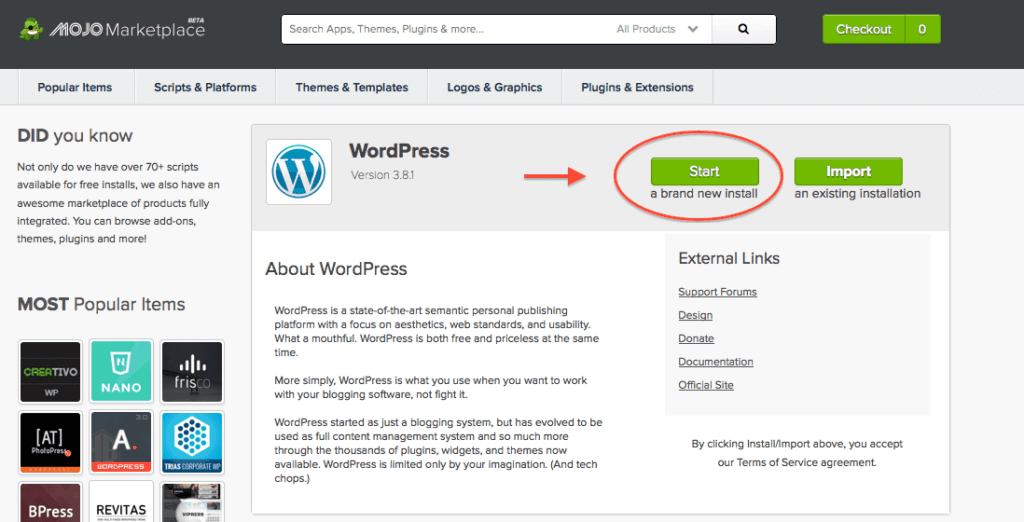
Click on Start

Your domain should appear here and you can click on “Check Domain”.
This will take you to the next screen.
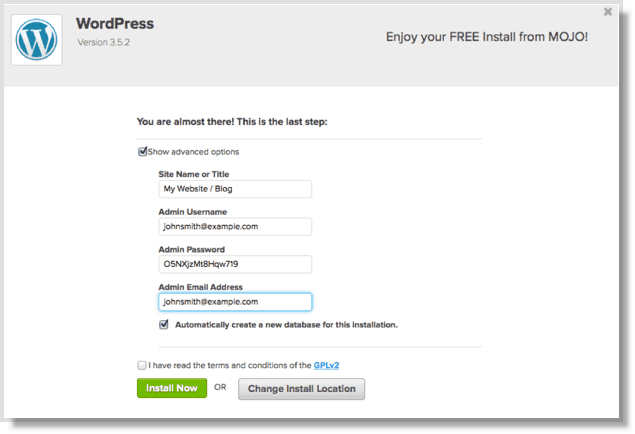
Make sure to fill out your information. Your email will be the Admin Username for your site. Create a new password.
You will be using this to log into your site to start creating your new domain.
You will want to change the name of your website and make sure”Automatically create a new database for this installation” is checked off. Read the terms and click no the check box and click on “Install Now”
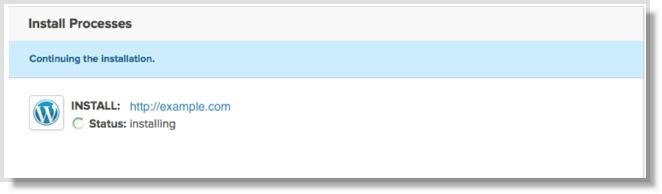
The install process will begin and you should see this screen.
Once the installation is complete you will see the following:

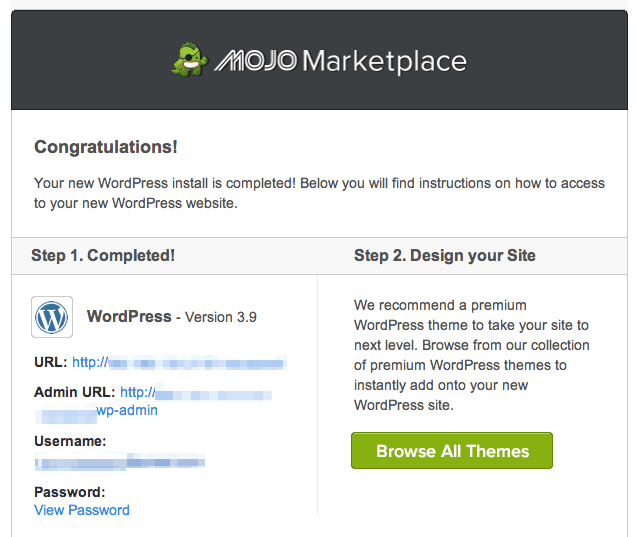
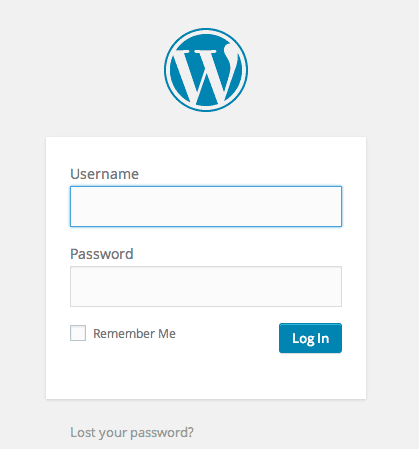
This will show you your login site link https://yoursitename.com/wp-admin
This is where you will go to put in the above username and password to get started on your site. There will be a login screen that looks like this. Enter your username and password and click on Log in.
Next, you will need to log in and select a theme. Your theme is the overall look of your site. At the time of writing this, the default template theme is 2016 but you can browse to pick any theme you like.
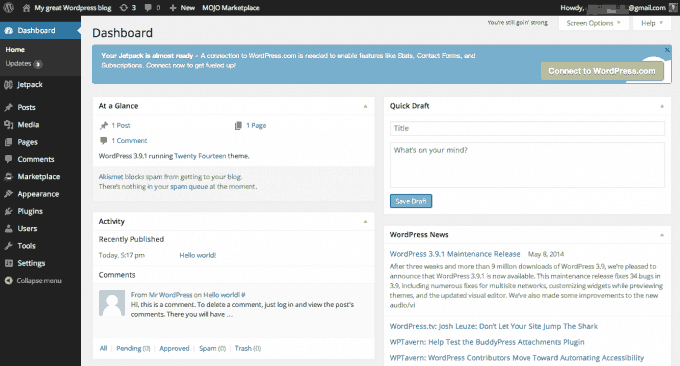
Congratulations you have now set up your website! Let me know if you had any problems and your web address I’m curious to see what kind of site you will come up with.